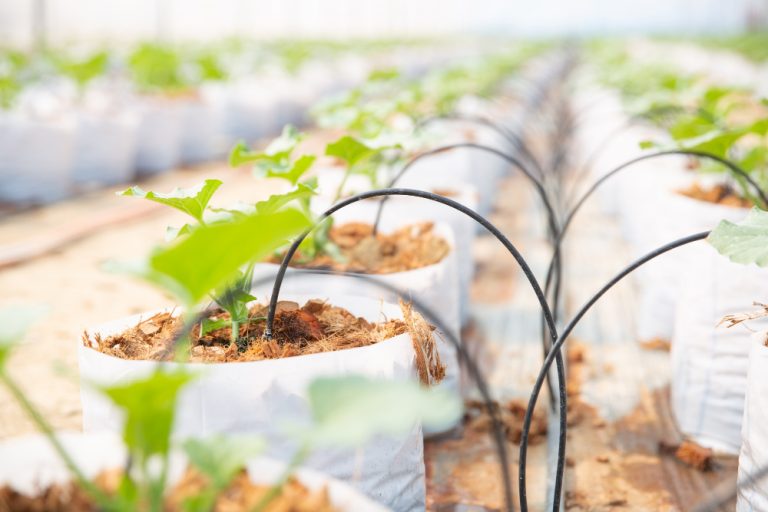
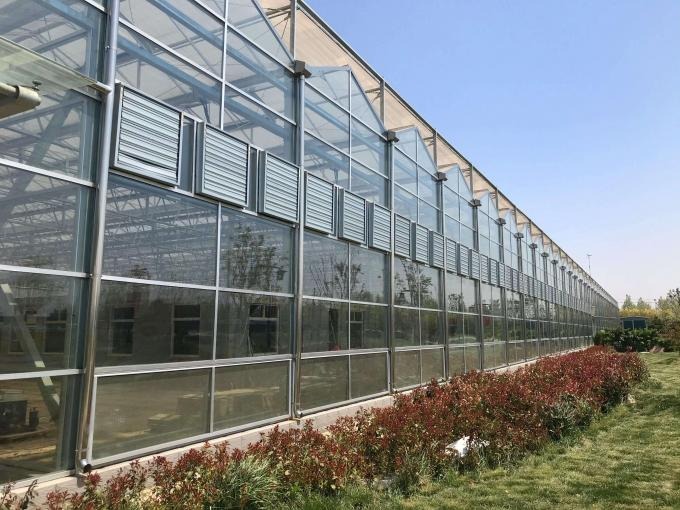
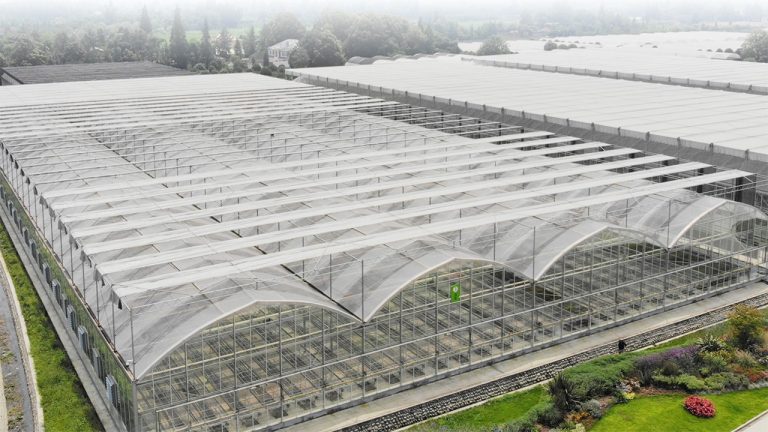
Building your own hydroponic greenhouse can be a rewarding and sustainable way to grow plants. Hydroponics is a soil-free method of growing plants that uses nutrient-rich water to nourish plant roots. By combining this technique with a greenhouse, you can create a controlled environment that maximizes plant growth year-round. Here’s a step-by-step guide to building your own hydroponic greenhouse:
1. Plan and Design Your Hydroponic Greenhouse
Before starting construction, take time to plan the layout and design of your greenhouse and hydroponic system. Consider the following:
a. Greenhouse Size and Type
- Size: Decide on the size of your greenhouse based on available space and how much you want to grow. For a small-scale DIY project, a 10×10 ft greenhouse can be sufficient for personal use.
- Type: Choose a greenhouse structure:
- Hoop House: A low-cost option with a PVC or metal frame covered with plastic film.
- Geodesic Dome: Strong and energy-efficient, but more complex to build.
- A-Frame: Simple and efficient, especially for areas with heavy snow loads.
b. Location
- Sunlight: Ensure the greenhouse gets ample natural light, ideally facing south (in the Northern Hemisphere) to maximize sunlight exposure.
- Water Access: Plan for easy access to water for both your hydroponic system and cooling (if necessary).
- Ventilation: Proper airflow is crucial to prevent overheating. Consider installing windows, louvres, or an automated ventilation system.
c. Hydroponic System Choice
There are several types of hydroponic systems to choose from. Here are some popular options:
- Deep Water Culture (DWC): Plants grow with their roots submerged in a nutrient-rich oxygenated water solution.
- Nutrient Film Technique (NFT): Nutrient solution flows over the plant roots in a thin film, usually in slanted channels.
- Ebb and Flow (Flood and Drain): The plant roots are periodically flooded with nutrient solution and then drained.
- Wick System: A passive hydroponic system where a wick draws nutrient solution up to the plant roots.
- Aeroponics: Roots are suspended in the air and misted with nutrient solution.
d. Materials and Tools
- Greenhouse frame materials (PVC, galvanized steel, or wood)
- Covering material (polycarbonate panels, poly film, or shade netting)
- Hydroponic components (growing trays, pipes, pumps, water reservoir, air pump, tubing)
- Growing medium (e.g., perlite, coconut coir, hydroton, or clay pellets)
- pH meter, EC meter (electrical conductivity), and nutrient solution
- Lighting system (if growing indoors or in low-light conditions)
2. Build the Greenhouse Frame and Structure
- Step 1: Frame Construction
- PVC or Galvanized Steel: PVC pipes or galvanized steel pipes are common materials for the frame. Both are durable and easy to work with.
- Hoop House Frame: For a simple hoop house, bend PVC pipes into arches and secure them to the ground with anchors. Then, connect the arches with horizontal support beams.
- A-Frame or Geodesic Dome: For a more rigid structure, build an A-frame using wood or metal beams, or create a geodesic dome with a more complex design.
- Step 2: Cover the Greenhouse
- Polycarbonate Panels: These are durable and provide better insulation, though they are more expensive.
- Polyethylene Film: A more affordable option, but it will need to be replaced every few years.
- Shade Netting: Can be used to provide partial shade or protection from excessive heat if you live in a particularly hot climate.
- Step 3: Add Doors and Ventilation
- Install a door or rolling shutter for easy access to the greenhouse.
- Ensure adequate ventilation by installing louvered vents or automated roof vents that open and close based on temperature or humidity levels.
- Step 4: Floor Setup
- For easy maintenance, use gravel, mulch, or rubber mats to cover the floor. This prevents soil from getting into the hydroponic system and helps with drainage.
3. Set Up the Hydroponic System
Now that you have the greenhouse structure in place, it’s time to install the hydroponic system. Here’s how to do it for some of the most common systems:
a. Deep Water Culture (DWC)
- Reservoir: Use a large plastic container or tank to hold your nutrient solution.
- Aeration: Place an air pump with an air stone in the reservoir to oxygenate the water.
- Net Pots: Cut holes in the top of the reservoir or a floating platform to hold the plants in net pots. Fill these with a growing medium (e.g., hydroton or clay pellets).
- Water and Nutrient Solution: Fill the reservoir with water and add a hydroponic nutrient mix. Monitor and adjust the pH and nutrient levels regularly.
b. Nutrient Film Technique (NFT)
- Channels: Create slanted channels (using PVC pipes or guttering) where the nutrient solution will flow over the plant roots. The roots should be partially submerged but not sitting in the solution.
- Pump and Reservoir: Use a water pump to circulate the nutrient solution from the reservoir through the channels and back into the reservoir.
c. Ebb and Flow System
- Flood Tray: Create a tray for your plants to sit in, ensuring it can hold water to flood the roots periodically.
- Pump: Use a submersible pump to flood the tray with nutrient solution.
- Drainage: After a certain period, the pump should shut off, and the water should drain back into the reservoir.
d. Wick System
- Wick: Place a wick in a container of nutrient solution to passively draw the nutrients up to the plants.
- Tray: Set up a tray to hold your plants and allow the wick to feed the roots.
e. Aeroponics
- Misting System: Create a misting system where the plant roots are suspended in the air, and nutrient solution is sprayed onto them using misting nozzles.
- Reservoir and Pump: Use a nutrient reservoir and pump to feed the misting system.
4. Install Water and Nutrient Delivery Systems
- Water Delivery: Set up tubing from your water reservoir to the hydroponic system. Ensure that the flow rate is appropriate for the type of hydroponic system you are using.
- Nutrient Solution: Add hydroponic nutrients to the water, and monitor the nutrient concentration (using an EC meter) and pH levels (using a pH meter). Adjust as necessary to keep the nutrient solution at optimal levels for plant growth.
- Filtration and Aeration: Consider adding a filtration system to keep the water clean and an air pump for additional oxygenation.
5. Monitor and Maintain Your Hydroponic Greenhouse
- Lighting: If your greenhouse isn’t getting enough natural light, use grow lights (LED or fluorescent) to supplement.
- Temperature and Humidity: Keep the temperature between 65°F and 75°F (18°C and 24°C) and humidity levels around 50-70% for optimal plant growth.
- Maintenance: Regularly check for any blockages in the water lines, clean the nutrient reservoir, monitor plant health, and adjust nutrient levels as needed.
6. Start Planting
- Choose Plants: Start with easy-to-grow crops like lettuce, herbs (basil, mint), spinach, or arugula. You can also try tomatoes, cucumbers, and peppers.
- Transplanting: Start your plants in small containers or starter plugs and then transplant them into your hydroponic system once they have grown strong roots.
Conclusion
Building your own hydroponic greenhouse is entirely possible with careful planning and the right materials. Mechanical skills, along with an interest in gardening, will allow you to create a functional and efficient growing environment. By selecting the right hydroponic system, setting up proper nutrient management, and maintaining the system, you can enjoy a sustainable, productive greenhouse that provides fresh produce year-round.


